Mine (PicoMite 5.09.00RC5) appears to have the “update firmware” command as the PicoCalc behaves as you describe and the RP1-RP2 folder then shows up. I have a Raspberry Pico 2W in my PicoCalc.
1 Like
That also happened to me when I flashed the same firmware on my Pico 2 no Wi-Fi directly from the computer using reset selection button. This was done outside of the PicoCalc. Have yet to test that updated Pico 2 installed in the PicoCalc.
Hope I don’t have to disassemble my PicoCalc just to update the Pico formware!
I am using Windows 11 on my Asus.507NV with a 3.2 USB.
I use the built-in file explorer to create two folders to be able to drag and drop.
Following the steps, I printed above this worked perfectly on my pico that came with the PicoCalc. I have not tried this on the Pico 2 with the Pico 2 firmware version.
I will be doing that later this week after I attach my RTC to the PicoCalc.
If you want to update the BASIC firmware and you can’t use the UPDATE FIRMWARE command from BASIC for some reason, you don’t have to take the back off. There’s a tiny button that’s accessible through the cooling slots. You hold that down with a thin instrument while turning the unit on. The update window will pop up on your PC. If you want to update the keyboard firmware, you do have to remove the back to move the switch that allows the keyboard firmware to be updated. Don’t worry too much about that, though. It’s not something you’ll have to do often once you’re at version 1.2.
1 Like
Disassembly is only suggested if the pico board is being swapped. To prevent the screen from being cracked. When I change my Pico to the Pico 2 I will disconnect the screen cable, remove the board and swap the pico to the pico 2.
I will also be removing these parts when I solder the RTC wiring to the main board as a precaution, as I really do not want to have to replace the screen.
Once you have replaced the pico board and reassembled you can use the reset button, which can be accessed through the vents in the case back with a toothpick to flash.
Google YouTube PicoCalc updating as there are many videos posted.
1 Like
When I try the tiny button method, it just boots PicoMite and comes up with “I2C Keyboard not found, OPTION KEYBOARD disabled” and a prompt. (And of course the keyboard doesn’t work.)
Actually, same happens simply by switching on PicoCalc with the micro usb attached…
And if I connect the micro usb AFTER doing the power-up/reset/boot thing, then things proceed as detailed before. I get the RP1-RP2 folder, but dropping the PicoMite_RP2350A_V6.00.02RC9.uf2 file in there nothing happens. Just stays as it was.
Now we’re getting somewhere.
That is the STM file bug, but I am new here and just going by what I’ve read and researched. Updating the Pico 2 and the Pico to the 6.00.02 will require the STM keyboard to be upgraded.
Toml mentioned it above, and that is the selection of dip switches which you can see in my image at the end of the arrow and updating the keyboard firmware.
Check out this thread and scroll down to the bottom and you will see an image of a black window with text explaining the STM updating requirement.
On my Pico shipped with the PicoCalc, which is not a Pico 2, after flashing as described, I still have my keyboard functional.
I am in the process of following that threads advice and downloading the STM software to automatically update the keyboard following the dip switch selection.
As I said, I am new here so this is all experimenting for me, too!
Unofficial PicoCalc PicoMite/WebMite firmware release thread (V6.00.02)
It is my understanding that upgrading to the 6.00 version may or may not result in a keyboard disconnect.
In my case I upgraded the supplied Pico from 5.00 version to the 6.00 version, and my keyboard is still functional. Maybe I am lucky or maybe it has something to do with the Pico versus Pico 2 update.
In any case, it is recommended that the keyboard STM firmware be upgraded as described in the thread that I have linked you to.
If anybody else can add to this, I would appreciate it as I am not an expert and only listed what worked for me using:
Windows 11
Asus FA 507NV
USB 3.2
Pico. (Not the Pico 2 variants)
And the drag and drop method with the “update firmware” command
In my new post I mention I had Pico and Pico 2 confused and that’s why I had trouble with the firmware update!
I may have to update the k/b firmware, but that’s now a separate issue ![]()
Oh, so success!
I don’t have to amend my process listed above.
Cheers
Successfully soldered the RTC into the PicoCalc as indicated by photo 1. Photo 2 indicates that the RTC is attached to the correct pins and recognized.
I mounted the RTC module onto the sd card metal cover. But before doing that, i laid down a layer of Kapton tape to cover the metal shield of the SD card framework. Then used double sided tape to adhere the IC of the RTC to the kapton covered SD card frame.
Then, like a klutz, I spent a couple of hours trying to set the RTC by googling, searching until I stumbled upon a really old school idea.
RTFM,!!! (Read the ******* manual).
That is where I stumbled upon the “RTC SETTIME” command!
From the MMBasic Language Manual, page 14:
RTC SETTIME 25, 06, 26, 15, 11, 45
Which translates to:
RTC SETTIME YEAR, MONTH, DATE, HOUR, MINUTE, SECONDS
2025, june 26th, 15:11:45
Where year is the last two digits of the century count. This command sets the RTC immediately to the second, hence the 45 seconds which I used. After all it is accurate if set precisely!
A case of where one must review the manual! Who knew!
So now to create a start up auto run program which displays the time and date.
This is fun!

2 Likes
Don’t forget OPTION RTC AUTO | ENABLE | DISABLE, Page 94
Enable auto-load time$ & date$ from RTC on boot & every hour.
With this option, you don’t need to set the internal clock from the RTC, it’s done automatically.
1 Like
Can’t use that in the UK as we’re on summer time !. I do a rough month calculation and add 1hr to the rtc time.
We are also on summer time (here we call it Daylight Savings Time - as if we can really change the length of daylight. ![]() )
)
The OPTION RTC only sets the internal MMBASIC software time from the RTC, so you would only need to manually set the RTC twice per year, then the OPTION RTC will take care of keeping the DATE$ and TIME$ variables correct each time you start up your PicoMite.
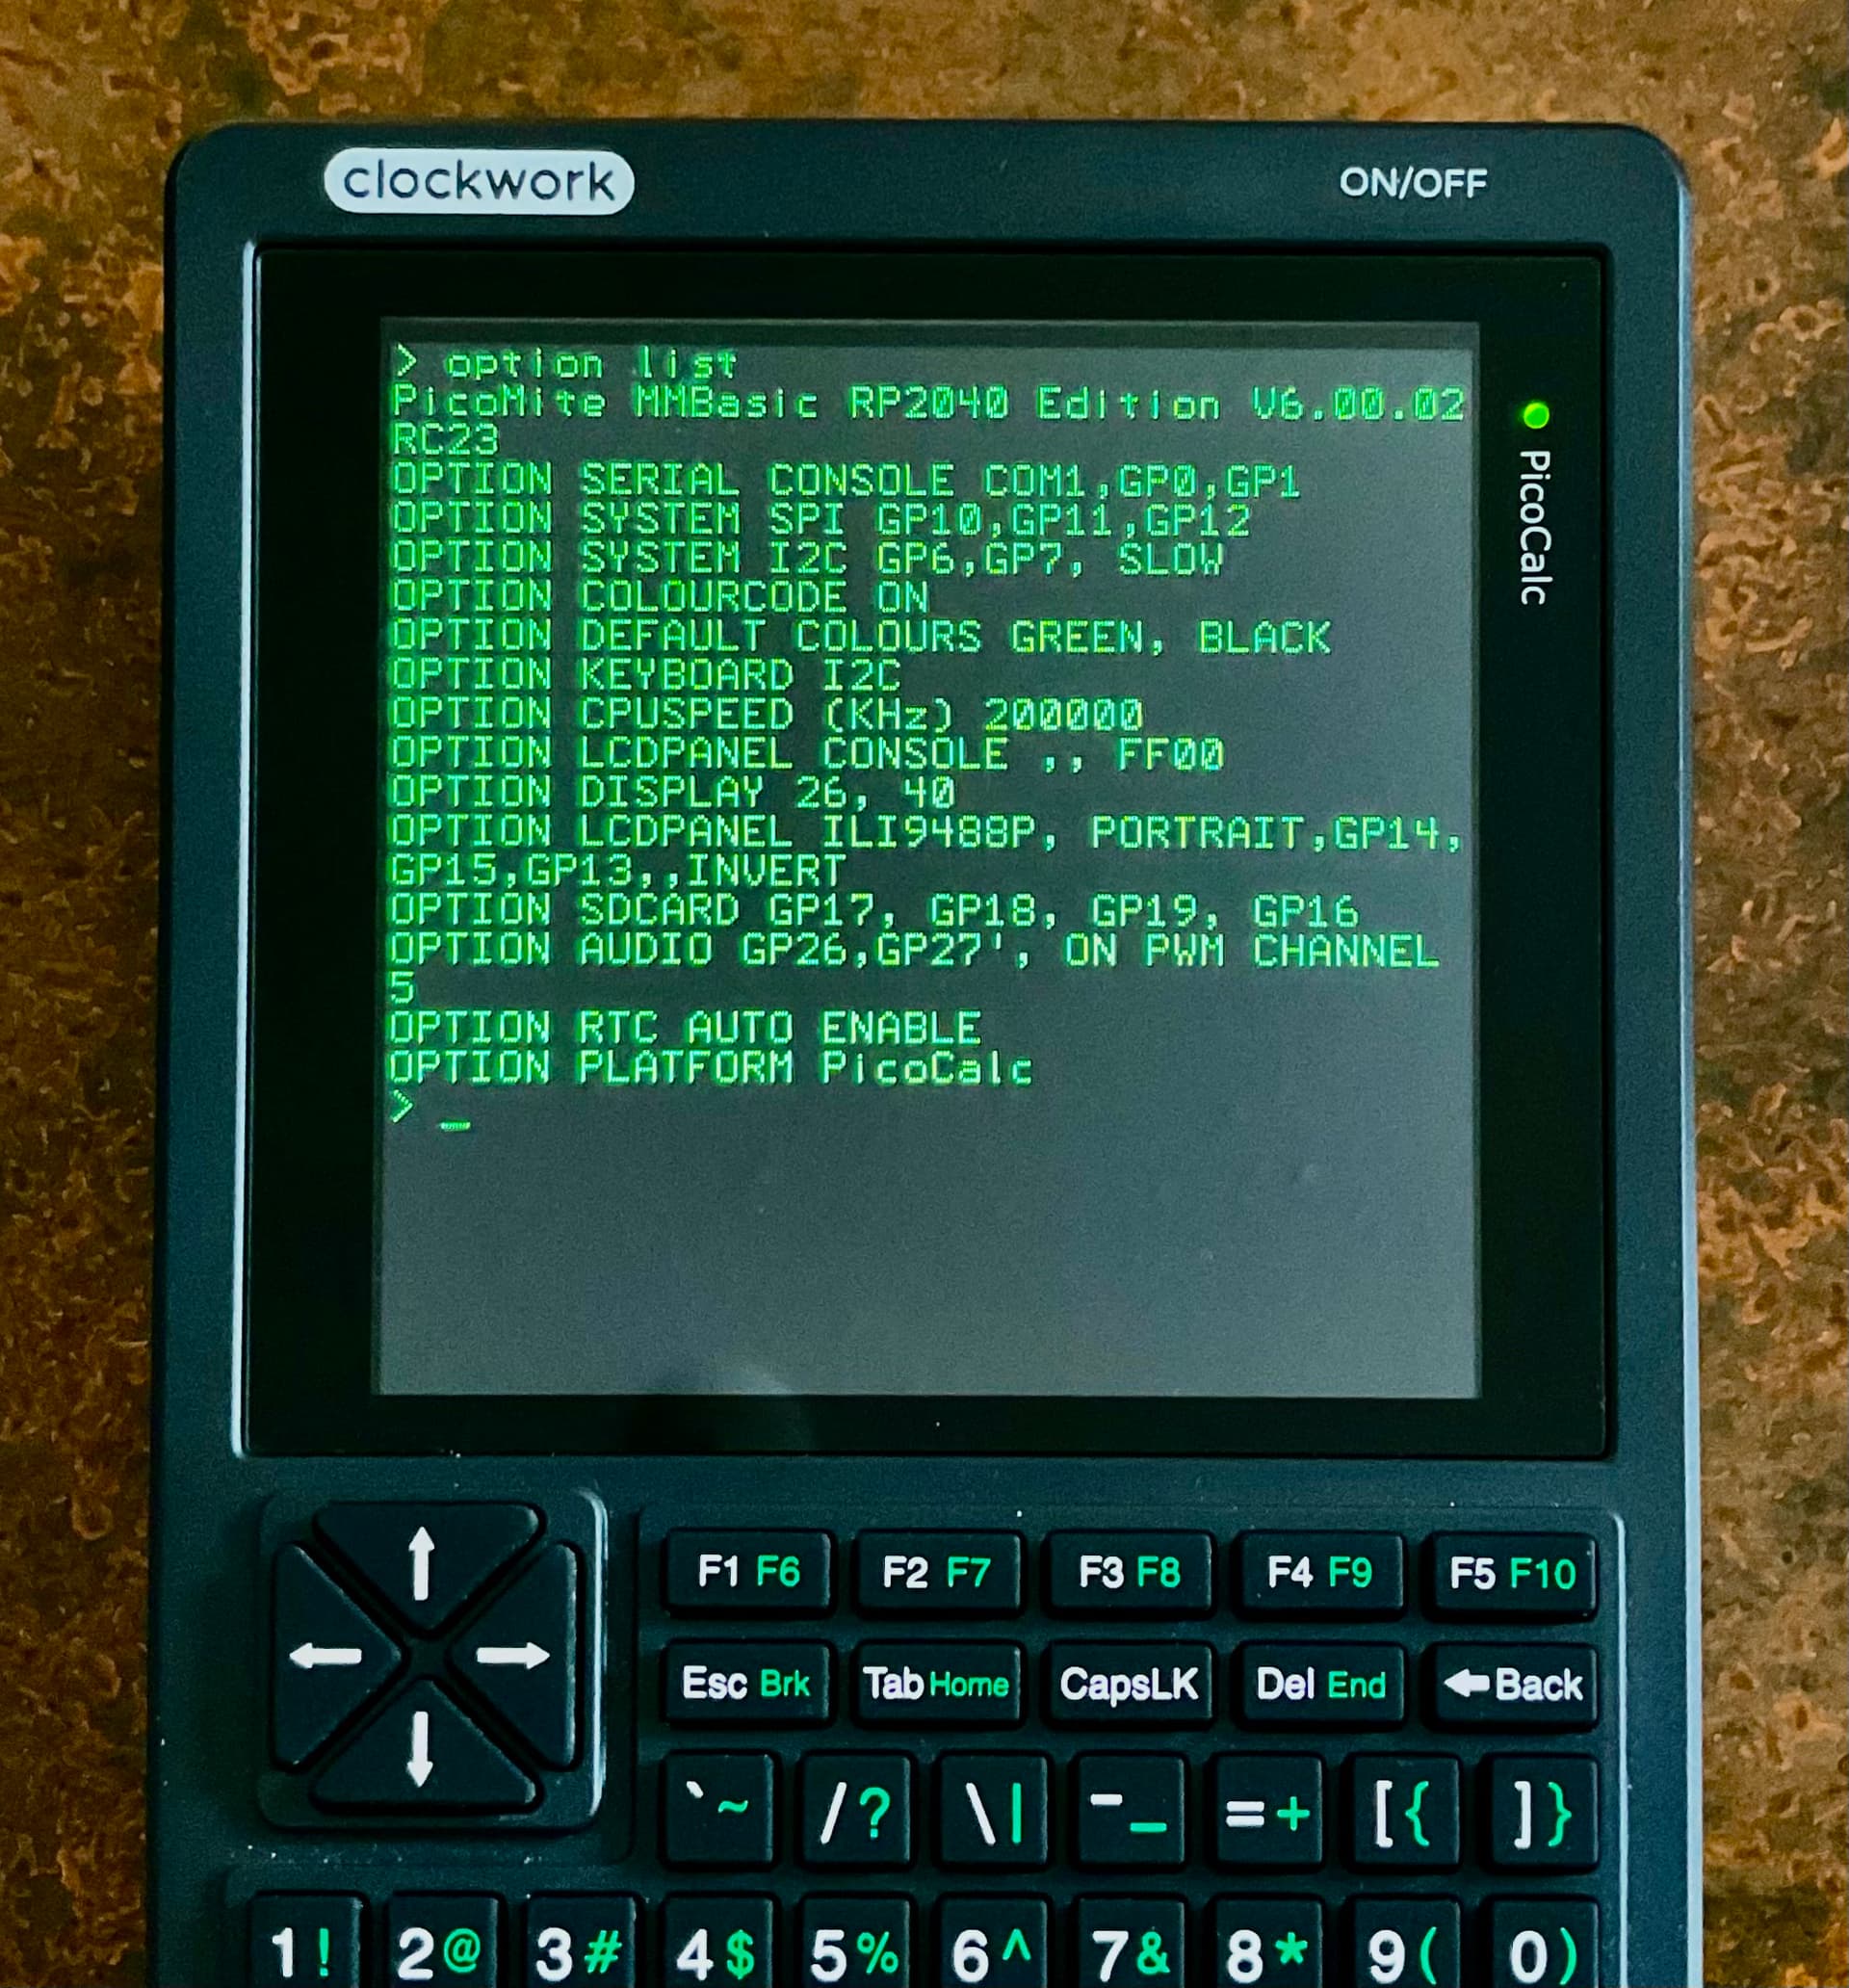
Never mind, I just took another look at the OPTION LIST on your screen - you already have the OPTION RTC AUTO enabled. Somehow I missed seeing that when I first looked over the options in your picture.
Sorry.
I’d rather the autorun software sorted it for me, that’s the beauty of computers ![]() . Setting the Pico once on startup is enough for me too, no need to repeat every hour…
. Setting the Pico once on startup is enough for me too, no need to repeat every hour…
You can write a simple program in BASIC that will either advance or retard to clock based on the date. Then you put that program in AUTOSAVE. Here’s a function that either returns 0 or 1 depending on whether or not we’re in DST
function IsDST(day, month,dow)
        ' January, february, and december are out.
        if  month < 3 or month > 11 then
               IsDST=0
              exit function
       end if
       ' April to October are in
       if month > 3 and month < 11 then
          IsDST=1
          exit function
       end if
       previousSunday = day - dow
       ' In March, we are DST if our previous Sunday was on or after the 8th.
        if month = 3 then
            IsDST=previousSunday >= 8
            exit function
       end if
        ' In November we must be before the first Sunday to be DST.
        ' That means the previous Sunday must be before the 1st.
        IsDST = previousSunday <= 0
end function
1 Like
Yes I have half done one that simply adjusts for the month, will narrow down to the day when I get the time (not from the RTC lol).
Done as well as you can see from the screen!