uConsole with CM4 & CM5 - with and without Waveshare board

I hope this helps someone new or those wondering which CM module to buy.

Now that I’ve had a few days playing with both CM4 and CM5 with and without the Waveshare spacer board, here’s what I think about the setup…

There’s a huge difference between CM4 and CM5. I have swapped them out multiple times and, performance-wise, there’s a stark difference between the two Pi boards. I haven’t run performance comparison apps, but generally in daily use the CM5 is noticably much faster with everything. The CM4 runs well and is perfectly adequate for most things though, with some lag and high CPU usage. The CM5 suffers from these at times too, just nowhere near as often.

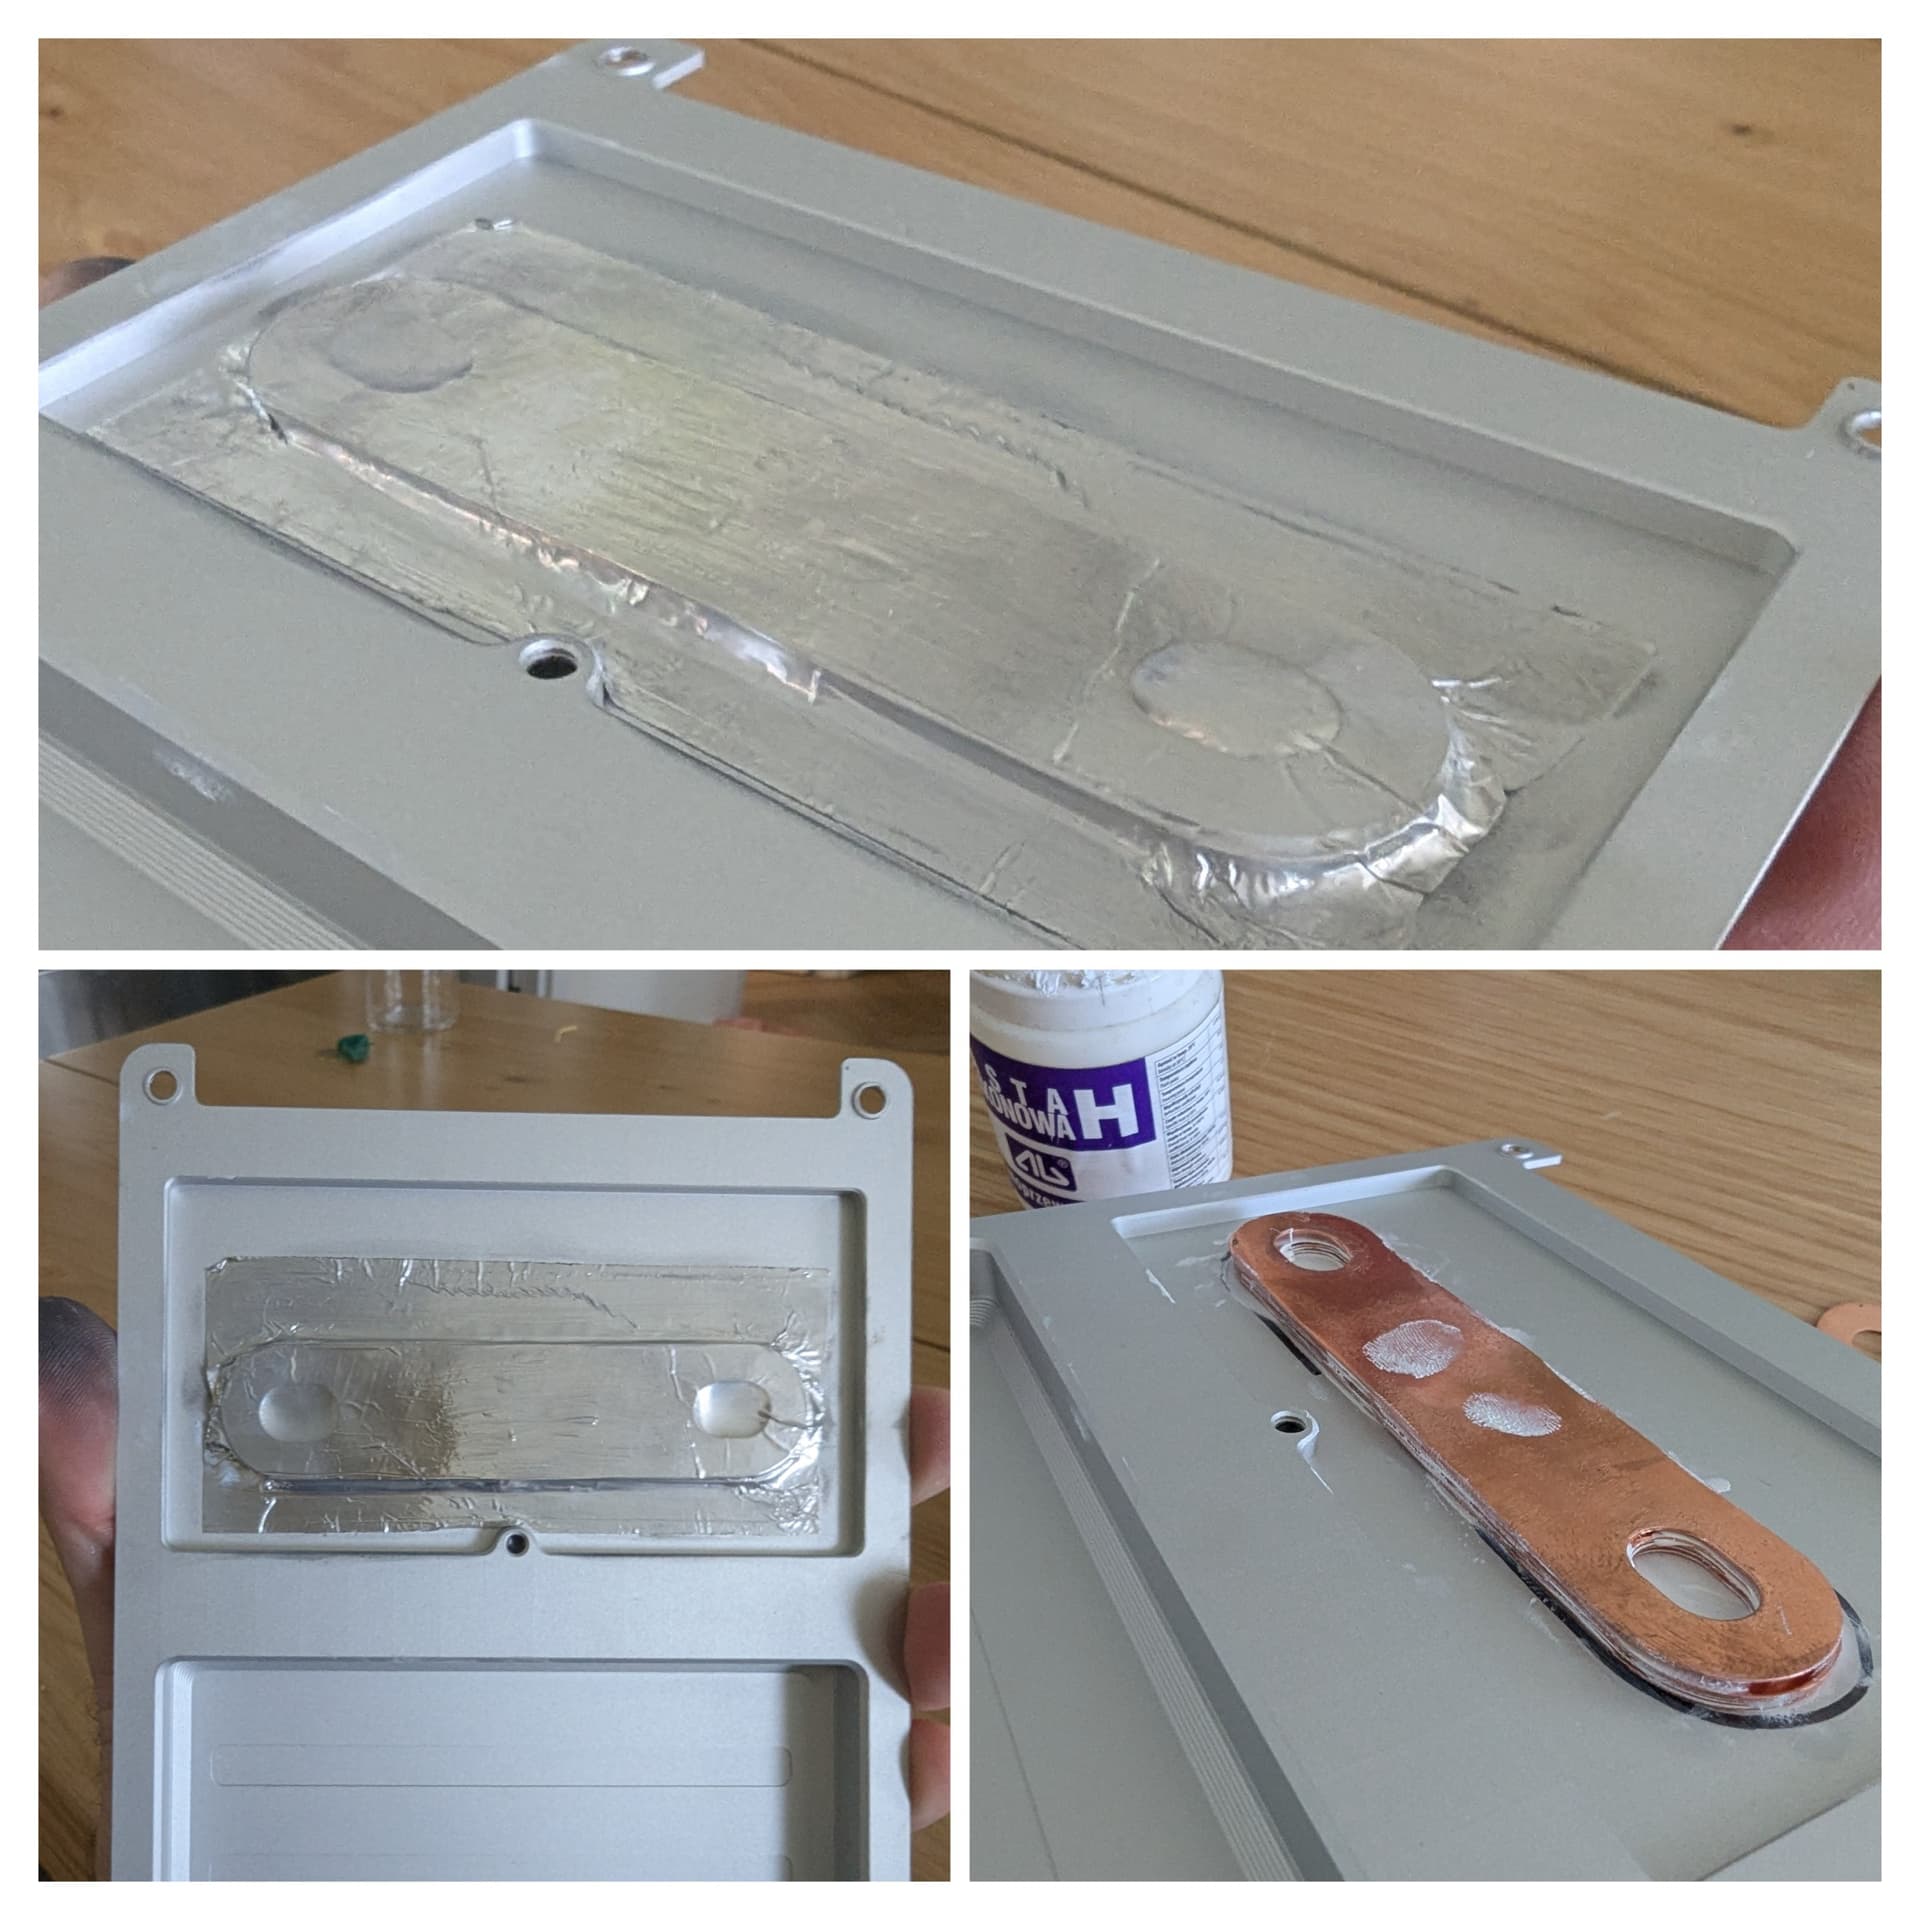
The big issue is heat. I have been using the CM5 fitted to the ‘Waveshare Interface Protection Adapter Board’ (available on Amazon), which is in turn fitted to the uConsole mainboard. This gives two layers of air between the mainboard and CM5. On top of that, I have a layer of 1.5mm ARCTIC TP-3 thermal pad between the CM5 and the rear metal case cover.

I wasn’t entirely happy with this setup though. The height of all these layers physically pushes the rear cover out and even bends it - not good. It certainly helped dissipate heat away from the boards and onto the rear metal cover, but can’t be good for the pressure being put on the boards.

On initial bootup with CM5/Waveshare the temp monitor in Linux shows 35 degrees with nothing but the OS running. This seems to stay fairly constant to begin with. After about an hour with nothing else running, the temp rose to 55 and stayed there. I think the passive cooling keeps it at this temp without anything other than the OS running.

Playing a full screen video in VLC immediately after bootup, for around 10 minutes, pushes the temp to 43-45. Again, leaving this running for longer takes the temp up to 60ish.

Adding a nooelec USB RTL-SDR dongle and running SDR++Brown software to listen to FM broadcasts for 10+ minutes takes the temp up further to 62 and it continued climbing. The CPU is showing 17-25% utilisation.

At this point, the rear cover gets hot around the area of the CM5!

So, I just re-fitted the CM5 without the Waveshare board and ran SDR++Brown with the nooelec dongle again. It lasted less than 3 minutes, the OS stopped and the screen went blank (although the power LED was still lit!) and I had to remove the batteries to shut it down. The last I saw was 82 degrees just before it died. Yikes.

So, I have a solution that I’m currently testing. I swapped out the stock hex bolts (M4x6mm) for some I bought (Amazon), which are M4x8mm. I also added two thin M4 washers to each of the four corner mounting holes. This adds a 2mm gap between the chassis and rear cover, which hopefully will improve air flow inside the unit and also prevents the CM5/Waveshare board combo from pressing against the rear cover.

The other solution I thought about for spacing is to 3D print some kind of surround between the chassis and rear cover. Think head gasket on a car. The thickness of the ‘gasket’ could be adjusted to accommodate space inside the case, if you could live with that. This, of course, would trap the hot air inside the case, unlike the idea I’m trying now with just washers.

After 20 minutes running SDR with this setup (along with Wifi and BT), I’m seeing a peak of around 63 degrees. It doesn’t go higher than that and drops to 61 every so often. GPU temp is showing 27-29 degrees fairly consistently.

The rear cover gets hot (almost too hot to touch) over the area where the boards are and it’s warm everywhere else (including where the batteries are). I guess that means the passive cooling is doing its job.

I do think the uConsole would benefit from some kind of active cooling given the CM5 heat issues, much like the tiny extractor fans we often see in handheld gaming consoles such as Odin 2 and Steam Deck. This would help enormously if there’s room in the case for something along these lines. I’m happy to go back to CM4, which never overheats, but would really miss the speed increases.

2 Likes

How do you measure temps?

I use “watch -n 1 vcgencmd measure_temp” in an executable script to monitor over time.

One neat solution might be to modify the back to allow the pi cm5 heatsink/fan to be attached. A fan header would be needed of course. Not sure if the clockwork board has this or not? I’ll check. If not, we might be able to convince the AIO board maker to allow for the addition of one since it’s that feature set pushes the cm4/cm5 to higher temps.

Maybe @Rex has some ideas?

This 3d printable replacement back might be an option as well. Still studying how the fan is driven.

2 Likes

Temps are built in with Bookworm. If you can’t see a tiny panel near the clock, it might just need to be made visible.
Right click the Taskbar and select Add/Remove Plugins.
You’ll see a dialog box split into four. Look at the ‘Right Side’ list and you’re looking for ‘CPU Temp’. If tha’ts not listed there, look at the ‘Available’ list. It should be there. You just need to add it for it to become visible on the Taskbar. I hope that makes sense and didn’t come across as patronising if you were already aware of the Taskbar plugins.

I was thinking about the fan earlier. If there was a header, I’d have thought it would be fairly easy to design and 3D print a rear cover with a vent to house the fan - and then I saw your link. I wonder if HackerGadgets would be interested in adding a header to future variations of their board. I might email Vileer to ask.

From the page you linked, it looks like they’re using GPIO pins on the mainboard for the fan. I’m not well up enough on electronics to do that myself without a guide though. It looks like a great design, especially with that battery. Nice.

Thanks for the info RE temps! From the pics within the link, it seems the fan control pins might be available in the ribbon cable shown. Reviewing schematics shortly.

My cm5 idling screensavers to using is around 50-61.5-62 deg with the fan starting at 255 but after some time , ubuntu use the sensors and kicks off once under the tresh until it gets hot again. My geekworm x1500 board fan really work nice and the cm5 isnt that hot considering the size of the tiny fan on a cm4 heatsync

Takes about 5min to get it down from 62 to somewhere around 50 when it kicks in

I’d be really interested in how this works. From the pic, it’s hard to see, but looks like it’s a simple header on the GPIO pins with wires from the fan.

Is that your plan on Thingiverse or did you build one based on that?

I’d love to add that case rear and fan unit if I could figure out the design. Mind you, without the battery too, I doubt the 18650’s would be much good for running a fan :grin:

Mine was stable until it got up to around 80 degrees. But, it was running too hot to touch on the metal case by the time it reached 65.

You’re using the geekworm fan in a uconsole?

You can get gasket paper on amazon, I got some and cut a gasket for the rear panel on the uconsole to give a hair more breathing room and also I think it minorly helps with wireless support.

Oh, I hadn’t heard of that, thanks. Another rabbit hole!!! :rofl:

I’m having a heck of a time keeping the CM5 cool enough to stop it from shutting down at the moment though.

I’m just installing RetroPie from the Git page using their shell script and apparently, it takes a long time to install. Within 3 minutes of it starting, the uConsole got to over 80 degrees and shut down. It’s currently sat next to a 10" fan on full and is just staying below 70.

It’s always when the CPU goes above 75% utilisation, especially running scripts and installs.

Edit; after 4 thermal shutdowns, I now have the case back off and the fan blowing directly onto the board. So far, 50 is the highest.

you should redo your thermal pad. i don’t have a riser and the stock thermal pad with a cm5 and before i put a m.2 heat sink on the back the most i seen stress testing was 72c. most i see after adding the m.2 heat sink is 64c.

1 Like

Thanks for the suggestion Rex, I’ve reapplied pads to each chip and it does seem better. I have also ordered an M2 heatsink for the back of the case too, that’s a great idea.

1 Like

This is working well for my CM5 Lite along with mild underclocked/undervoltage settings, striking a good balance with no significant loss of performance in SDR++, mildly improved battery life, and lower CPU and back cover temps.

1 Like

I’m not quite following you here. If your setup with a 1.5mm thermal pad pushes too hard on the back, why not use a thinner thermal pad? As far as heat-sinking is concerned, “less is more”.

I’d think a good thermal connection to the case (or any heatsink) would provide better cooling than air trapped in the case. Moving the board a mm or so probably isn’t going to make a huge difference. Air is effectively an insulator, only provides cooling with considerable convection. Direct conduction to metal dwarfs it in terms of thermal transfer. Thick thermal pads are better than nothing, but are rubbish compared to a heat sink directly against the object in question with minimal, high quality paste.

If anything, I’d consider making the most solid contact with the rear case with the thinnest thermal pad or paste possible and consider sticking a heat sink block on the back of the cover if you must run the CM5 full speed.

Have you considered underclocking the CM5 a bit? Yes, you’ll lose some performance, but will still have significant gains over the CM4 while preserving battery life better.

I’m of the same opinion. The more thermal mass the back of the case has, the better. Also the thinner the pad, or paste is even better. For this to work, I stacked some copper plates with paste between them, and taped them to the back of the uConsole, with some aluminium tape. This way, the gap between the CM5 and the “back” is less than 1mm, and paste does a great job. I haven’t seen my CPU temps over about 63-64C, even with full speed compilation (all 4 cores - 100%)

It didn’t push against the cover until I added the Waveshare board. I was just trying all different combinations to find something that worked to keep the temps down. Never having owned a uConsole or RPi CM board before, there was a lot of trial and error and guesswork :smiling_face:

My original post was just about what I’d tried, what worked and what didn’t.

1 Like

Right. I ordered one of those boards on your suggestion - haven’t used it yet.

Why don’t you use the board to reduce the thickness of thermal pad between the CPU and case as much as possible? Less is better; the ideal setup would be nothing more than a thin film of thermal paste.

Hi Doug,
Reducing the thermal pad is exactly what I ended up doing after all the messing around with different setups :grin: I’m still looking to replace the one I have with a thinner version when I get the chance. The Waveshare board is great for the price and definitely helps with the temps once fitted.

One thing I love about this kit is how much tinkering you can do with it. I’m now exploring a 3D printed rear cover with a cutout for a CM5 passive heatsink. The heatsink is only around £5 and the cover probably pennies to print. I’m only doing it because I can and want to see how effective it is.