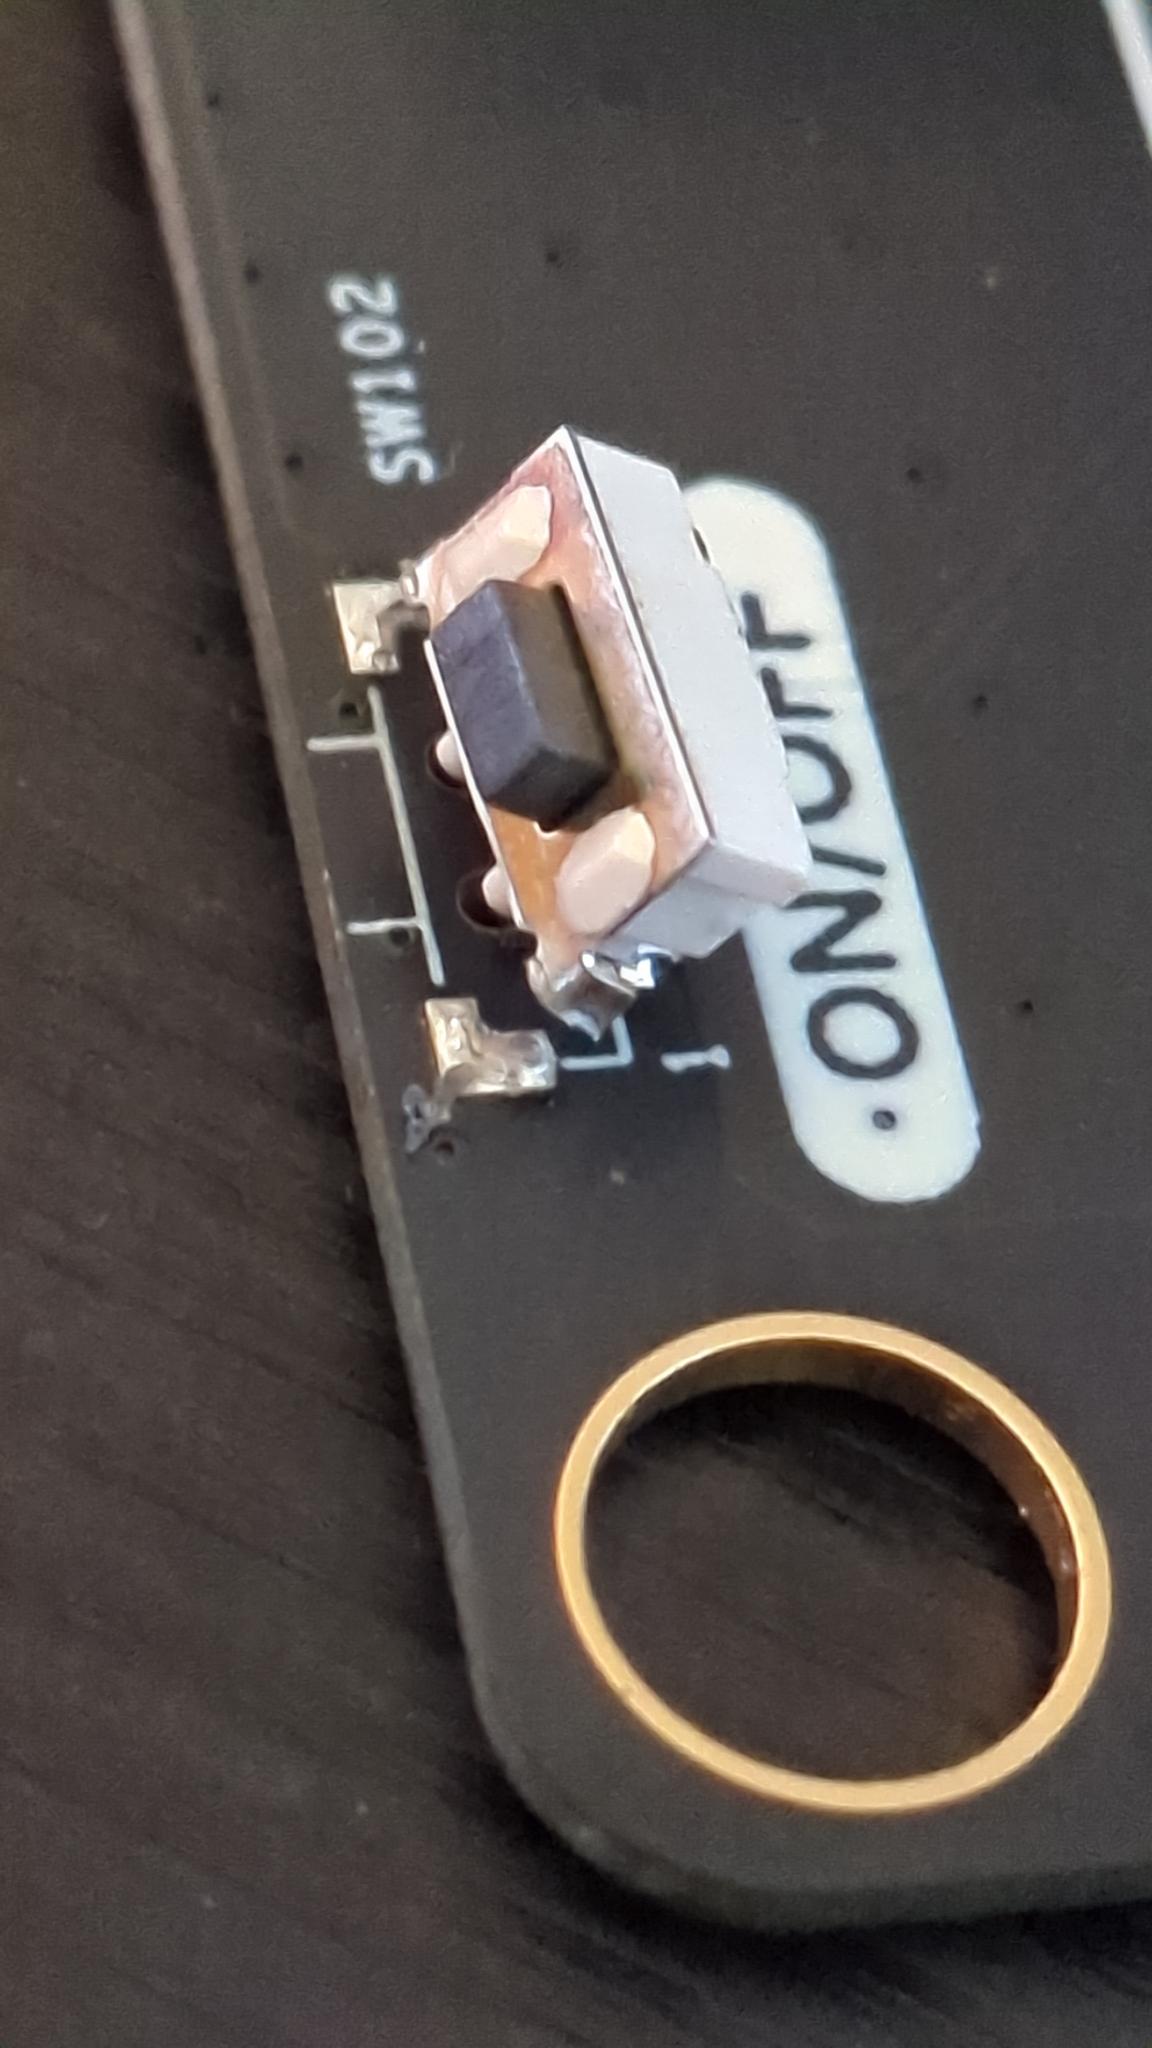
I have apparently turned my PicoCalc on and off a few too many times. The power button has broken from its solder pads and lifted right off the PCB, and is (predictably) no longer working. I didn’t think I was actuating it too hard…
I have never repaired a surface mount component. Does anyone have any advice on how to most cleanly fix this? Is this a heat gun or little hotplate situation? Will I need something other than just normal solder - SMD uses solder paste, right? It looks far enough from other components that I feel like it can be safely handled even by a clumsy oaf such as myself…
I think if I can manage to get it re-soldered on there OK, I’ll 3D-print a brace to hold it in place and share the STL to maybe save everyone else’s button.
Luckily it’s just the solder that’s broken, the tracks/pads seem intact. A fine tipped soldering iron should do the trick if very careful. Apply downward pressure while reheating the joints…. A good joint will look shiny afterwards, not matt and no cracks etc.
Cool, I’ll give it a try, thanks! I didn’t know if it being a surface mount component changed that at all, I don’t know the difference between the solder paste and the normal stuff, so I didn’t know if it would reflow correctly.
I’ve designed a little ‘backplate’ for the switch to glue on to help secure it … once I’ve installed it and tested that it functions as expected to reduce stress on the button joints, I’ll come back and drop a STL
Don’t fall into that trap! Fine tips are always a terrible choice - they simply don’t transfer enough heat. This part has big pads and plenty of space around it, so a large tip is the ideal tool for the job. Chisel tips are often a good choice if you can - you get a sharpish edge if you need to get into a tight spot, but there’s far more metal for heat transfer.
Add some extra normal solder and plenty of flux, and the solder will naturally go where it needs to, even if your iron is touching all the pins simultaneously - have a look at a youtube video of drag soldering if you don’t believe me. If you end up putting too much extra solder down and it bridges pins, suck it up with some solder wick, and it’ll magically fix itself.
You don’t need paste. That’s just useful for applying across an entire PCB with a stencil, or sometimes with a syringe, but it’s not something that’s intrinsically needed for SMD work. I always use ordinary solder wire.
The solder already on the picocalc is lead-free, which is generally a lot harder to work with and not as flexible as leaded solder. The magic trick here is simply to add more solder. Since you’ll be using ordinary leaded solder (seriously, always use ordinary leaded solder), it’ll mix with the existing solder and instantly become easy to deal with.
avoid conical tips. chisel or knife tips will transfer the heat better like others said. the trick is to just be careful with what you’re touching with it
on top of that, a soldering iron with controlled temperature is a must. the important part is not how much control you have over the temperature, but rather that a controlled iron will work better to maintain a temperature rather than just have it sucked away by the board
magnification will help you way more than you think. if you think you have too shaky a grip to do microsoldering, try it with a magnifying lens or a microscope, and you’ll feel like you’ve developed a superpower. brains work weird like that
FLUX. flux flux flux. you will need flux to help the transfer of heat.
use 60/40 solder at the least, 63/37 is best but usually more expensive. i bought a 1lb roll of Kester and never looked back, it really is worth the price for how easily it flows. a lot of trouble you’ll have soldering with cheaper stock will simply disappear
Thanks for your tips folks! I managed to get it soldered back on. The pads on the ‘front’ that were most obviously damaged turned out to be purely structural solders, the actual contacts for the button were teeny tiny little pads on the back face. Some (ugly) soldering got everything wired back up, and instead of a brace, I opted to just drown the sucker in some hot glue to make it totally rigid. I might regret this later if it breaks again, but it’s working again for now!
If I got another PicoCalc, I’d probably immediately add a bead of hot glue to the back of the switch. I’ve been thinking about it, and I really don’t think I was that mean to it, so I have a bit of anxiety over the other surface-mounted inputs on the edge of the board now too… maybe it’s time for them to get a bit of glue too.
I had a similar issue with surface mount solder joints being used to support a connector. I ended up backing it with a bit of JB Weld plastic epoxy putty.
I have some of the same concerns with the power switch in the PicoCalc, and there really should have been a tab on the the case bottom that backed the switch. At some point, I’m going to make a simple brace to put in the casing bottom to address that.