More info
-
I made a change to the skin file slightly, for those wanting to just incrementally download things themselves. A small colour change to the Wonderswan icon, since the blue was a little bit off. Also, updating the main skin with all of the most current changes.
https://drive.google.com/open?id=1nGaprKSo875NLkASRDpUkXUR4atnkD7F
-
I forgot to add a directory called “SCUMMVM” in /home/cpi/games/
Just add that, and then add SCUMMVM games to that if you use it.
-
I also modified the drastic.cfg file slightly, after realising that some games on DS prefer to have the bottom screen as the main display, eg Dragon Quest VI. Some other DS games also have the screens tiled. I simply changed the behaviour of the screen switch using shift + A/B.
frameskip_type = 2
frameskip_value = 4
show_frame_counter = 0
screen_orientation = 2
screen_scaling = 2
screen_swap = 0
savestate_number = 0
fast_forward = 0
enable_sound = 1
clock_speed = 0
threaded_3d = 1
mirror_touch = 0
compress_savestates = 1
savestate_snapshot = 1
unzip_roms = 1
backup_in_savestates = 1
ignore_gamecard_limit = 0
frame_interval = 0
trim_roms = 1
fix_main_2d_screen = 0
disable_edge_marking = 0
hires_3d = 0
use_rtc_custom_time = 0
rtc_custom_time = 0
rtc_system_time = 0
firmware.username = DEOT
firmware.language = 1
firmware.favorite_color = 0
firmware.birthday_month = 1
firmware.birthday_day = 2
enable_cheats = 1
controls_a[CONTROL_INDEX_UP] = 338
controls_a[CONTROL_INDEX_DOWN] = 337
controls_a[CONTROL_INDEX_LEFT] = 336
controls_a[CONTROL_INDEX_RIGHT] = 335
controls_a[CONTROL_INDEX_A] = 107
controls_a[CONTROL_INDEX_B] = 106
controls_a[CONTROL_INDEX_X] = 105
controls_a[CONTROL_INDEX_Y] = 117
controls_a[CONTROL_INDEX_L] = 121
controls_a[CONTROL_INDEX_R] = 111
controls_a[CONTROL_INDEX_START] = 13
controls_a[CONTROL_INDEX_SELECT] = 32
controls_a[CONTROL_INDEX_HINGE] = 8
controls_a[CONTROL_INDEX_TOUCH_CURSOR_UP] =
controls_a[CONTROL_INDEX_TOUCH_CURSOR_DOWN] =
controls_a[CONTROL_INDEX_TOUCH_CURSOR_LEFT] =
controls_a[CONTROL_INDEX_TOUCH_CURSOR_RIGHT] =
controls_a[CONTROL_INDEX_TOUCH_CURSOR_PRESS] =
controls_a[CONTROL_INDEX_MENU] = 8
controls_a[CONTROL_INDEX_SAVE_STATE] =
controls_a[CONTROL_INDEX_LOAD_STATE] =
controls_a[CONTROL_INDEX_FAST_FORWARD] =
controls_a[CONTROL_INDEX_SWAP_SCREENS] = 108
controls_a[CONTROL_INDEX_SWAP_ORIENTATION_A] =
controls_a[CONTROL_INDEX_SWAP_ORIENTATION_B] = 104
controls_a[CONTROL_INDEX_LOAD_GAME] =
controls_a[CONTROL_INDEX_QUIT] =
controls_a[CONTROL_INDEX_UI_UP] = 338
controls_a[CONTROL_INDEX_UI_DOWN] =337
controls_a[CONTROL_INDEX_UI_LEFT] = 336
controls_a[CONTROL_INDEX_UI_RIGHT] = 335
controls_a[CONTROL_INDEX_UI_SELECT] = 107
controls_a[CONTROL_INDEX_UI_BACK] = 106
controls_a[CONTROL_INDEX_UI_EXIT] = 27
controls_a[CONTROL_INDEX_UI_PAGE_UP] = 111
controls_a[CONTROL_INDEX_UI_PAGE_DOWN] = 121
controls_a[CONTROL_INDEX_UI_SWITCH] = 32
controls_b[CONTROL_INDEX_UP] =
controls_b[CONTROL_INDEX_DOWN] =
controls_b[CONTROL_INDEX_LEFT] =
controls_b[CONTROL_INDEX_RIGHT] =
controls_b[CONTROL_INDEX_A] =
controls_b[CONTROL_INDEX_B] =
controls_b[CONTROL_INDEX_X] =
controls_b[CONTROL_INDEX_Y] =
controls_b[CONTROL_INDEX_L] =
controls_b[CONTROL_INDEX_R] =
controls_b[CONTROL_INDEX_START] =
controls_b[CONTROL_INDEX_SELECT] =
controls_b[CONTROL_INDEX_HINGE] =
controls_b[CONTROL_INDEX_TOUCH_CURSOR_UP] =
controls_b[CONTROL_INDEX_TOUCH_CURSOR_DOWN] =
controls_b[CONTROL_INDEX_TOUCH_CURSOR_LEFT] =
controls_b[CONTROL_INDEX_TOUCH_CURSOR_RIGHT] =
controls_b[CONTROL_INDEX_TOUCH_CURSOR_PRESS] =
controls_b[CONTROL_INDEX_MENU] =
controls_b[CONTROL_INDEX_SAVE_STATE] =
controls_b[CONTROL_INDEX_LOAD_STATE] =
controls_b[CONTROL_INDEX_FAST_FORWARD] =
controls_b[CONTROL_INDEX_SWAP_SCREENS] =
controls_b[CONTROL_INDEX_SWAP_ORIENTATION_A] =
controls_b[CONTROL_INDEX_SWAP_ORIENTATION_B] =
controls_b[CONTROL_INDEX_LOAD_GAME] =
controls_b[CONTROL_INDEX_QUIT] =
controls_b[CONTROL_INDEX_UI_UP] =
controls_b[CONTROL_INDEX_UI_DOWN] =
controls_b[CONTROL_INDEX_UI_LEFT] =
controls_b[CONTROL_INDEX_UI_RIGHT] =
controls_b[CONTROL_INDEX_UI_SELECT] =
controls_b[CONTROL_INDEX_UI_BACK] =
controls_b[CONTROL_INDEX_UI_EXIT] =
controls_b[CONTROL_INDEX_UI_PAGE_UP] =
controls_b[CONTROL_INDEX_UI_PAGE_DOWN] =
controls_b[CONTROL_INDEX_UI_SWITCH] =
If you haven’t already installed Drastic, give it a go. It works very well. See this post:
Desmume or MelonDS
- I’ve also modified the controls of mupen a little bit, just to make the C buttons match up more with the shift + ABXY buttons. C-Up and C-Down were mixed up.
# Mupen64Plus Configuration File
# This file is automatically read and written by the Mupen64Plus Core library

[64DD]

# Filename of the 64DD IPL ROM
IPL-ROM = ""
# Filename of the disk to load into Disk Drive
Disk = ""


[Audio-SDL]

# Mupen64Plus SDL Audio Plugin config parameter version number
Version = 1.000000
# Frequency which is used if rom doesn't want to change it
DEFAULT_FREQUENCY = 33600
# Swaps left and right channels
SWAP_CHANNELS = False
# Size of primary buffer in output samples. This is where audio is loaded after it's extracted from n64's memory.
PRIMARY_BUFFER_SIZE = 16384
# Fullness level target for Primary audio buffer, in equivalent output samples. This value must be larger than the SECONDARY_BUFFER_SIZE. Decreasing this value will reduce audio latency but requires a faster PC to avoid choppiness. Increasing this will increase audio latency but reduce the chance of drop-outs.
PRIMARY_BUFFER_TARGET = 2048
# Size of secondary buffer in output samples. This is SDL's hardware buffer. The SDL documentation states that this should be a power of two between 512 and 8192.
SECONDARY_BUFFER_SIZE = 1024
# Audio resampling algorithm. src-sinc-best-quality, src-sinc-medium-quality, src-sinc-fastest, src-zero-order-hold, src-linear, speex-fixed-{10-0}, trivial
RESAMPLE = "trivial"
# Volume control type: 1 = SDL (only affects Mupen64Plus output)  2 = OSS mixer (adjusts master PC volume)
VOLUME_CONTROL_TYPE = 1
# Percentage change each time the volume is increased or decreased
VOLUME_ADJUST = 5
# Default volume when a game is started.  Only used if VOLUME_CONTROL_TYPE is 1
VOLUME_DEFAULT = 80
# Synchronize Video/Audio
AUDIO_SYNC = False


[Core]

# Mupen64Plus Core config parameter set version number.  Please don't change this version number.
Version = 1.010000
# Draw on-screen display if True, otherwise don't draw OSD
OnScreenDisplay = False
# Use Pure Interpreter if 0, Cached Interpreter if 1, or Dynamic Recompiler if 2 or more
R4300Emulator = 2
# Disable compiled jump commands in dynamic recompiler (should be set to False)
NoCompiledJump = False
# Disable 4MB expansion RAM pack. May be necessary for some games
DisableExtraMem = True
# Increment the save state slot after each save operation
AutoStateSlotIncrement = False
# Activate the R4300 debugger when ROM execution begins, if core was built with Debugger support
EnableDebugger = False
# Save state slot (0-9) to use when saving/loading the emulator state
CurrentStateSlot = 0
# Path to directory where screenshots are saved. If this is blank, the default value of ${UserDataPath}/screenshot will be used
ScreenshotPath = ""
# Path to directory where emulator save states (snapshots) are saved. If this is blank, the default value of ${UserDataPath}/save will be used
SaveStatePath = ""
# Path to directory where SRAM/EEPROM data (in-game saves) are stored. If this is blank, the default value of ${UserDataPath}/save will be used
SaveSRAMPath = ""
# Path to a directory to search when looking for shared data files
SharedDataPath = ""
# Force number of cycles per emulated instruction
CountPerOp = 0
# Randomize PI/SI Interrupt Timing
RandomizeInterrupt = True
# Duration of SI DMA (-1: use per game settings)
SiDmaDuration = -1
# Gameboy Camera Video Capture backend
GbCameraVideoCaptureBackend1 = ""


[CoreEvents]

# Mupen64Plus CoreEvents config parameter set version number.  Please don't change this version number.
Version = 1.000000
# SDL keysym for stopping the emulator
Kbd Mapping Stop = 8
# SDL keysym for switching between fullscreen/windowed modes
Kbd Mapping Fullscreen = 0
# SDL keysym for saving the emulator state
Kbd Mapping Save State = 269
# SDL keysym for loading the emulator state
Kbd Mapping Load State = 270
# SDL keysym for advancing the save state slot
Kbd Mapping Increment Slot = 0
# SDL keysym for resetting the emulator
Kbd Mapping Reset = 290
# SDL keysym for slowing down the emulator
Kbd Mapping Speed Down = 291
# SDL keysym for speeding up the emulator
Kbd Mapping Speed Up = 292
# SDL keysym for taking a screenshot
Kbd Mapping Screenshot = 293
# SDL keysym for pausing the emulator
Kbd Mapping Pause = 112
# SDL keysym for muting/unmuting the sound
Kbd Mapping Mute = 109
# SDL keysym for increasing the volume
Kbd Mapping Increase Volume = 93
# SDL keysym for decreasing the volume
Kbd Mapping Decrease Volume = 91
# SDL keysym for temporarily going really fast
Kbd Mapping Fast Forward = 27
# SDL keysym for advancing by one frame when paused
Kbd Mapping Frame Advance = 47
# SDL keysym for pressing the game shark button
Kbd Mapping Gameshark = 103
# Joystick event string for stopping the emulator
Joy Mapping Stop = ""
# Joystick event string for switching between fullscreen/windowed modes
Joy Mapping Fullscreen = ""
# Joystick event string for saving the emulator state
Joy Mapping Save State = ""
# Joystick event string for loading the emulator state
Joy Mapping Load State = ""
# Joystick event string for advancing the save state slot
Joy Mapping Increment Slot = ""
# Joystick event string for resetting the emulator
Joy Mapping Reset = ""
# Joystick event string for slowing down the emulator
Joy Mapping Speed Down = ""
# Joystick event string for speeding up the emulator
Joy Mapping Speed Up = ""
# Joystick event string for taking a screenshot
Joy Mapping Screenshot = ""
# Joystick event string for pausing the emulator
Joy Mapping Pause = ""
# Joystick event string for muting/unmuting the sound
Joy Mapping Mute = ""
# Joystick event string for increasing the volume
Joy Mapping Increase Volume = ""
# Joystick event string for decreasing the volume
Joy Mapping Decrease Volume = ""
# Joystick event string for fast-forward
Joy Mapping Fast Forward = ""
# Joystick event string for advancing by one frame when paused
Joy Mapping Frame Advance = ""
# Joystick event string for pressing the game shark button
Joy Mapping Gameshark = ""


[Input-SDL-Control1]

# Mupen64Plus SDL Input Plugin config parameter version number.  Please don't change this version number.
version = 2.000000
# Controller configuration mode: 0=Fully Manual, 1=Auto with named SDL Device, 2=Fully automatic
mode = 0
# Specifies which joystick is bound to this controller: -1=No joystick, 0 or more= SDL Joystick number
device = -1
# SDL joystick name (or Keyboard)
name = "Keyboard"
# Specifies whether this controller is 'plugged in' to the simulated N64
plugged = True
# Specifies which type of expansion pak is in the controller: 1=None, 2=Mem pak, 4=Transfer pak, 5=Rumble pak
plugin = 2
# If True, then mouse buttons may be used with this controller
mouse = False
# Scaling factor for mouse movements.  For X, Y axes.
MouseSensitivity = "2.00,2.00"
# The minimum absolute value of the SDL analog joystick axis to move the N64 controller axis value from 0.  For X, Y axes.
AnalogDeadzone = "4096,4096"
# An absolute value of the SDL joystick axis >= AnalogPeak will saturate the N64 controller axis value (at 80).  For X, Y axes. For each axis, this must be greater than the corresponding AnalogDeadzone value
AnalogPeak = "32768,32768"
# Digital button configuration mappings
DPad R = "key(100)"
DPad L = "key(97)"
DPad D = "key(115)"
DPad U = "key(119)"
Start = "key(13)"
Z Trig = "key(105)"
B Button = "key(117)"
A Button = "key(106)"
C Button R = "key(108)"
C Button L = "key(121)"
C Button D = "key(104)"
C Button U = "key(111)"
R Trig = "key(107)"
L Trig = "key(32)"
Mempak switch = "key(44)"
Rumblepak switch = "key(46)"
# Analog axis configuration mappings
X Axis = "key(276,275)"
Y Axis = "key(273,274)"


[Input-SDL-Control2]

# Mupen64Plus SDL Input Plugin config parameter version number.  Please don't change this version number.
version = 2.000000
# Controller configuration mode: 0=Fully Manual, 1=Auto with named SDL Device, 2=Fully automatic
mode = 2
# Specifies which joystick is bound to this controller: -1=No joystick, 0 or more= SDL Joystick number
device = -1
# SDL joystick name (or Keyboard)
name = ""
# Specifies whether this controller is 'plugged in' to the simulated N64
plugged = False
# Specifies which type of expansion pak is in the controller: 1=None, 2=Mem pak, 4=Transfer pak, 5=Rumble pak
plugin = 2
# If True, then mouse buttons may be used with this controller
mouse = False
# Scaling factor for mouse movements.  For X, Y axes.
MouseSensitivity = "2.00,2.00"
# The minimum absolute value of the SDL analog joystick axis to move the N64 controller axis value from 0.  For X, Y axes.
AnalogDeadzone = "4096,4096"
# An absolute value of the SDL joystick axis >= AnalogPeak will saturate the N64 controller axis value (at 80).  For X, Y axes. For each axis, this must be greater than the corresponding AnalogDeadzone value
AnalogPeak = "32768,32768"
# Digital button configuration mappings
DPad R = ""
DPad L = ""
DPad D = ""
DPad U = ""
Start = ""
Z Trig = ""
B Button = ""
A Button = ""
C Button R = ""
C Button L = ""
C Button D = ""
C Button U = ""
R Trig = ""
L Trig = ""
Mempak switch = ""
Rumblepak switch = ""
# Analog axis configuration mappings
X Axis = ""
Y Axis = ""


[Input-SDL-Control3]

# Mupen64Plus SDL Input Plugin config parameter version number.  Please don't change this version number.
version = 2.000000
# Controller configuration mode: 0=Fully Manual, 1=Auto with named SDL Device, 2=Fully automatic
mode = 2
# Specifies which joystick is bound to this controller: -1=No joystick, 0 or more= SDL Joystick number
device = -1
# SDL joystick name (or Keyboard)
name = ""
# Specifies whether this controller is 'plugged in' to the simulated N64
plugged = False
# Specifies which type of expansion pak is in the controller: 1=None, 2=Mem pak, 4=Transfer pak, 5=Rumble pak
plugin = 2
# If True, then mouse buttons may be used with this controller
mouse = False
# Scaling factor for mouse movements.  For X, Y axes.
MouseSensitivity = "2.00,2.00"
# The minimum absolute value of the SDL analog joystick axis to move the N64 controller axis value from 0.  For X, Y axes.
AnalogDeadzone = "4096,4096"
# An absolute value of the SDL joystick axis >= AnalogPeak will saturate the N64 controller axis value (at 80).  For X, Y axes. For each axis, this must be greater than the corresponding AnalogDeadzone value
AnalogPeak = "32768,32768"
# Digital button configuration mappings
DPad R = ""
DPad L = ""
DPad D = ""
DPad U = ""
Start = ""
Z Trig = ""
B Button = ""
A Button = ""
C Button R = ""
C Button L = ""
C Button D = ""
C Button U = ""
R Trig = ""
L Trig = ""
Mempak switch = ""
Rumblepak switch = ""
# Analog axis configuration mappings
X Axis = ""
Y Axis = ""


[Input-SDL-Control4]

# Mupen64Plus SDL Input Plugin config parameter version number.  Please don't change this version number.
version = 2.000000
# Controller configuration mode: 0=Fully Manual, 1=Auto with named SDL Device, 2=Fully automatic
mode = 2
# Specifies which joystick is bound to this controller: -1=No joystick, 0 or more= SDL Joystick number
device = -1
# SDL joystick name (or Keyboard)
name = ""
# Specifies whether this controller is 'plugged in' to the simulated N64
plugged = False
# Specifies which type of expansion pak is in the controller: 1=None, 2=Mem pak, 4=Transfer pak, 5=Rumble pak
plugin = 2
# If True, then mouse buttons may be used with this controller
mouse = False
# Scaling factor for mouse movements.  For X, Y axes.
MouseSensitivity = "2.00,2.00"
# The minimum absolute value of the SDL analog joystick axis to move the N64 controller axis value from 0.  For X, Y axes.
AnalogDeadzone = "4096,4096"
# An absolute value of the SDL joystick axis >= AnalogPeak will saturate the N64 controller axis value (at 80).  For X, Y axes. For each axis, this must be greater than the corresponding AnalogDeadzone value
AnalogPeak = "32768,32768"
# Digital button configuration mappings
DPad R = ""
DPad L = ""
DPad D = ""
DPad U = ""
Start = ""
Z Trig = ""
B Button = ""
A Button = ""
C Button R = ""
C Button L = ""
C Button D = ""
C Button U = ""
R Trig = ""
L Trig = ""
Mempak switch = ""
Rumblepak switch = ""
# Analog axis configuration mappings
X Axis = ""
Y Axis = ""


[Rsp-HLE]

# Mupen64Plus RSP HLE Plugin config parameter version number
Version = 1.000000
# Path to a RSP plugin which will be used when encountering an unknown ucode.You can disable this by letting an empty string.
RspFallback = ""
# Send display lists to the graphics plugin
DisplayListToGraphicsPlugin = True
# Send audio lists to the audio plugin
AudioListToAudioPlugin = False


[Transferpak]

# Filename of the GB ROM to load into transferpak 1
GB-rom-1 = ""
# Filename of the GB RAM to load into transferpak 1
GB-ram-1 = ""
# Filename of the GB ROM to load into transferpak 2
GB-rom-2 = ""
# Filename of the GB RAM to load into transferpak 2
GB-ram-2 = ""
# Filename of the GB ROM to load into transferpak 3
GB-rom-3 = ""
# Filename of the GB RAM to load into transferpak 3
GB-ram-3 = ""
# Filename of the GB ROM to load into transferpak 4
GB-rom-4 = ""
# Filename of the GB RAM to load into transferpak 4
GB-ram-4 = ""


[UI-Console]

# Mupen64Plus UI-Console config parameter set version number.  Please don't change this version number.
Version = 1.000000
# Directory in which to search for plugins
PluginDir = "/usr/local/lib/mupen64plus/"
# Filename of video plugin
VideoPlugin = "mupen64plus-video-rice.so"
# Filename of audio plugin
AudioPlugin = "mupen64plus-audio-sdl.so"
# Filename of input plugin
InputPlugin = "mupen64plus-input-sdl.so"
# Filename of RSP plugin
RspPlugin = "mupen64plus-rsp-hle.so"


[Video-General]

# Use fullscreen mode if True, or windowed mode if False
Fullscreen = True
# Width of output window or fullscreen width
ScreenWidth = 320
# Height of output window or fullscreen height
ScreenHeight = 240
# If true, activate the SDL_GL_SWAP_CONTROL attribute
VerticalSync = True


[Video-Rice]

# Mupen64Plus Rice Video Plugin config parameter version number
Version = 1
# Frame Buffer Emulation (0=ROM default, 1=disable)
FrameBufferSetting = 0
# Frequency to write back the frame buffer (0=every frame, 1=every other frame, etc)
FrameBufferWriteBackControl = 0
# Render-to-texture emulation (0=none, 1=ignore, 2=normal, 3=write back, 4=write back and reload)
RenderToTexture = 4
# Control when the screen will be updated (0=ROM default, 1=VI origin update, 2=VI origin change, 3=CI change, 4=first CI change, 5=first primitive draw, 6=before screen clear, 7=after screen drawn)
ScreenUpdateSetting = 4
# Force to use normal alpha blender
NormalAlphaBlender = False
# Use a faster algorithm to speed up texture loading and CRC computation
FastTextureLoading = False
# Use different texture coordinate clamping code
AccurateTextureMapping = False
# Force emulated frame buffers to be in N64 native resolution
InN64Resolution = 3
# Try to reduce Video RAM usage (should never be used)
SaveVRAM = False
# Enable this option to have better render-to-texture quality
DoubleSizeForSmallTxtrBuf = 4
# Force to use normal color combiner
DefaultCombinerDisable = False
# Enable game-specific settings from INI file
EnableHacks = False
# If enabled, graphics will be drawn in WinFrame mode instead of solid and texture mode
WinFrameMode = False
# N64 Texture Memory Full Emulation (may fix some games, may break others)
FullTMEMEmulation = False
# Enable vertex clipper for fog operations
OpenGLVertexClipper = False
# Enable/Disable SSE optimizations for capable CPUs
EnableSSE = True
# If this option is enabled, the plugin will skip every other frame
SkipFrame = False
# If enabled, texture enhancement will be done only for TxtRect ucode
TexRectOnly = False
# If enabled, texture enhancement will be done only for textures width+height<=128
SmallTextureOnly = False
# Select hi-resolution textures based only on the CRC and ignore format+size information (Glide64 compatibility)
LoadHiResCRCOnly = True
# Enable hi-resolution texture file loading
LoadHiResTextures = False
# Enable texture dumping
DumpTexturesToFiles = False
# Display On-screen FPS
ShowFPS = False
# Use Mipmapping? 0=no, 1=nearest, 2=bilinear, 3=trilinear
Mipmapping = 0
# Enable, Disable fog generation (0=Disable, 1=Enable)
FogMethod = 0
# Force to use texture filtering or not (0=auto: n64 choose, 1=force no filtering, 2=force filtering)
ForceTextureFilter = 0
# Primary texture enhancement filter (0=None, 1=2X, 2=2XSAI, 3=HQ2X, 4=LQ2X, 5=HQ4X, 6=Sharpen, 7=Sharpen More, 8=External, 9=Mirrored)
TextureEnhancement = 0
# Secondary texture enhancement filter (0 = none, 1-4 = filtered)
TextureEnhancementControl = 0
# Color bit depth to use for textures (0=default, 1=32 bits, 2=16 bits)
TextureQuality = 2
# Z-buffer depth (only 16 or 32)
OpenGLDepthBufferSetting = 16
# Enable/Disable MultiSampling (0=off, 2,4,8,16=quality)
MultiSampling = 0
# Color bit depth for rendering window (0=32 bits, 1=16 bits)
ColorQuality = 0
# OpenGL level to support (0=auto, 1=OGL_FRAGMENT_PROGRAM)
OpenGLRenderSetting = 0
# Enable/Disable Anisotropic Filtering for Mipmapping (0=no filtering, 2-16=quality). This is uneffective if Mipmapping is 0. If the given value is to high to be supported by your graphic card, the value will be the highest value your graphic card can support. Better result with Trilinear filtering
AnisotropicFiltering = 0
# If true, use polygon offset values specified below
ForcePolygonOffset = False
# Specifies a scale factor that is used to create a variable depth offset for each polygon
PolygonOffsetFactor = 0.000000
# Is multiplied by an implementation-specific value to create a constant depth offset
PolygonOffsetUnits = 0.000000
-
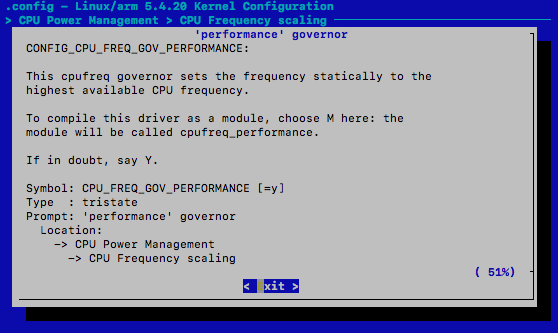
I’m mucking around with the 5.5.9 kernel, just to see how the schedutil governor behaves.
Hopefully we can get 1400GHz to be somewhat standardised and not be too much of a power drain.
Running 5.5.9 at 1400MHz is very nice. Without the OC, dragon quest VI on DS runs very choppy at times, especially with fog. Likewise, banjo Kazooie has slow downs when too many models appear on screen at once. The kernel/OC combo basically addresses both. Zelda Ocarina of Time on Mupen is now VERY playable.
-
I’ve made a simple script to copy whatever kernel and dtb file into the boot partition to let you set each up respectively. Maybe I should release the next version with stock speeds/kernel, with the option of enabling the newer and faster combo as a test.
Here’s a link to the small script: (Note: This is purely for testing! It is an overclock after all, and I can’t guarantee what the results of using this will be)
https://drive.google.com/open?id=1x1_jhFIaBlrRvuugzQNVMvZ25hVot4Qg
Copy the 07_Clockspeed and 08_Kernel folders to /home/cpi/apps/Menu/60_Utils/, then give all of the *.sh scripts the executable bit, ie chmod +x filename.sh (if they need it - they shouldn’t)
Running each will overwrite whatever is in your boot partition, so as a precaution backup before using this. This script doesn’t back up your original kernel/dtb file. As the name of each script would suggest, it goes between the stock Kernel versions 5.4.21 (The version on the current 2003131 build is 5.4.20, so this is a small incremental upgrade) and the current latest stable 5.5.9. I wouldn’t normally recommend using an untested new kernel; instead preferring to use old stable. But this image is about pushing limits, and testing what the newest things are.
Likewise, it has scripts for going between 1008MHz (stock) and an experimental overclocked 1400MHz. This is using the work of @Joao_Manoel as seen here: (with a few modifications, eg extra governors, custom boot screen etc.)
1.2GHz and beyond
For more information re: how to manually change clock speeds etc, check out here:
https://wiki.archlinux.org/index.php/CPU_frequency_scaling
@adcockm - That could be useful for what you were asking in this post.
Custom D.E.O.T. V2.0+/Clockwork OS v0.5 image - With customised DEOT interface, Kernel 5.4.20, Debian 10 Buster, Retroarch 1.8.4, Mupen64+ plus more! (Current build: 200313)
-
Just for contiguity, I changed the palette of the desktopbg.jpg file, normally only visible while connected via HDMI. My OCD was getting the better of me, and I needed it changed. The file goes in /home/cpi/launcher/sys.py/gameshell/wallpaper/ and also resides in /home/cpi/skins/DEOT/sys.py/gameshell/wallpaper/ but doesn’t appear to serve any function here.
Here’s what it looks like. (it used to be an orange palette, and was clashing HORRIBLE with the DEOT colours.
-
I just loaded up the launcher go for fun. Boy was I in for a shock. Compared to the main launcher, the Launched go had some major lag issues. There was no wrap around cursor. Input would be delayed. Frame rate of moving items was very slow. I remember hearing of potential removal in a future official image. I may just take the liberty of removing it earlier, along with the removal of the “switch to launcher go” settings list item. I don’t think it will be too missed, since it hasn’t been maintained for a long time.
I don’t see this being that big an update, so won’t make an update any time soon. I’ll provide info on how to do changes, where they are somewhat significant. Eg, potential Kernel changes etc.
A lot of my evenings where I would normally rehearse and perform (I’m a musician) are freed up due to the recent pandemic etc, so I will be a lot more free to mess about with the gameshell. I’ll start focussing on getting the Settings pages to be closer to the stock DEOT image.
I’m also thinking, as good as the DEOT image is, this might be a good opportunity to make an original graphical UI. Even one based on a different launcher.
I do wonder, are most of the people who use this image a) those who own a DEOT gameshell wanting to have the DEOT theme, b) those who just like the darker theme, c) people who like the maintained features, d) people wanting a out of box pre-set up OS, e) people just wanting something different. It would be interesting to know for future releases.